Sorry for the delay in updating with this third installment - I've been busy with real-life issues. I hope you haven't been biting your nails for this one!


We left off in the last part with the shaped copper wings waiting to be enameled. As you can see, we've jumped a bit in time - I don't have pictures between that one and this. In this picture, I have all of the pieces assembled (but not glued) - the carved boxwood body, the enameled wings, and the two sets of pierced silver components that sandwich the enameled pieces. I had decided to carve the wood a little more to get a better shape, hence the un-dyed portion.
The part we are missing is the making of the silver wings. Each piece started out as part of one big sheet of silver, which was cut out with a tiny saw, filed, and shaped with hammers. The smaller silver pieces that make up the top layer have silver pegs on the bottom that poke through holes in both sets of lower wings and peg them into the wood body.
 Now that the beetle was pretty much taken care of, I needed to make the rest of the necklace. If I just strung it on a plain chain, it would look unbalanced, especially in regards to color. These spiculum pieces, made of copper and enamel, were made to go on either side of the bug. The bottom copper shape is what it looks like before it is formed with hammers and a sinusoidal stake.
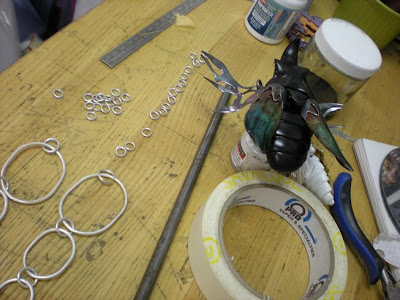
A lot of my designing is done on the fly. Pretty much 90% of the time I have no idea what the piece is going to look like once I'm finished. Here, I tested out a few different layouts for the chain - this one used tiny commercial chain to connect to the beetle, and the large links were oriented upside-down.
 My baby is all grown up! All components of the beetle are finished/oxidized, the body dyed and sealed, and everything glued together and drying. After this, I hammered the links of the chain and oxidized them before assembling. The sad part about my photos is that you can't see the clasp on this piece, which I really like - it's a toggle clasp made up of a large silver ring and an enameled spiculum. Oh well, so there you go - a semi-complete look into the journey of making one of my pieces! Thanks for indulging me!

2 comments:
Hey Emi! Just wondering if you've seen the American Craft April/May issue? There's an article on Jennifer Angus in there that I thought you might find interesting. She makes things with actual insects, using them sort of like wall paper...
yeah, i have that issue, and love her work. thank you for posting this, by the way - you reminded me that i have to change my address for Metalsmith.
Post a Comment